"Tilt-shift Photography on Photoshop"
Before

After

Step 1. Photo selection.
select your photo from file menu.


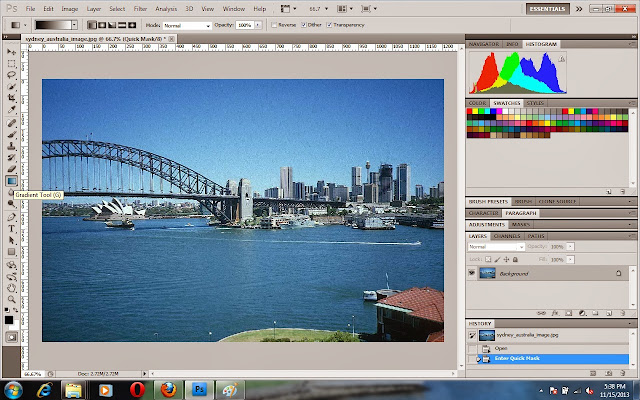
Step 2. Enter "Quick Mask Mode"
open the image in Photoshop & enter "quick mask mode" by pressing 'Q' on the keyboard.

Step 3. Choose "Gradient Tool"
Choose the Gradient tool by pressing 'G' on keyboard. Or you can select gradient tool by selecting
gradient tool icon that shown in below picture.
Step 4. Draw a line.
* Draw a vertical line,
* The start point will be the center of the in-focus area,
&
* The end will be where transition from in-focus out to out-of-focus completed.

Before processing, review the position of the red mask.

Step 5. Return to standard Mode
Press 'Q' on keyboard to exit Quick Mask Mode and return to Standard Mode.

Step. 6 Open lens Blur.
* Choose Filter menu,
* Then choose Blur,
*In Blur you can choose Lens Blur.

Step 7. Review Effect & Tweak Setting.
* Hopefully, you will now see the focus effect.
* The default setting of photoshop for lens blur seems to work well.
* Click ok for save changes.

* you will see the previous windows in which you are working before applying lens blur.

Step 8. Remove selection.
* you can deselect your selection by pressing 'Ctrl +D'

Step 9. Boost Saturation.
* Press 'Ctrl+ U' on keyboard for Hue/Saturation menu.
* In this Example, I boost the saturation to +40
* Click OK

Step 10. Open Curves Adjustment.
* Choose 'Image'menu
* Select 'Adjustment'
*Then choose 'Curves'

Step 11. Adjust Curves.
* Drag a black line where u want.
then
* Put 7 into input box & 9 into output box.

Step 12. Save photo.
Save your photo by selecting file menu.

Expected Photo is Ready...! :)

No comments:
Post a Comment